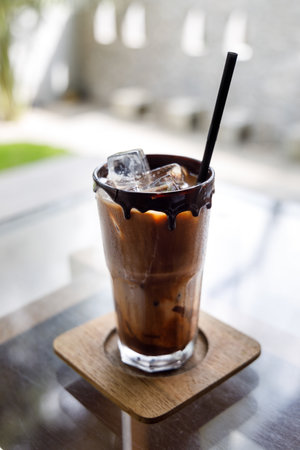
Understanding Nitro Cold Brew
When it comes to coffee innovations, nitro cold brew stands out as a science-driven trend that’s taken American coffee culture by storm. Unlike regular iced coffee—which is simply hot-brewed coffee chilled and served over ice—nitro cold brew starts with cold brew concentrate, which is then infused with nitrogen gas. This infusion process gives nitro cold brew its signature creamy mouthfeel and cascading visual effect when poured, similar to a draft beer. The secret lies in the chemistry: nitrogen, being less soluble than carbon dioxide, forms tiny bubbles that create a thick, velvety texture without adding sweetness or calories. Flavor-wise, nitro cold brew is smoother and less acidic than both traditional hot coffee and standard iced coffee, making it easier on the stomach while highlighting subtle chocolatey or nutty notes present in the beans. Understanding these scientific differences not only enhances appreciation for nitro cold brew but also sets the stage for brewing it at home without fancy equipment.
Essential Ingredients and Simple Tools
If you’re ready to make nitro cold brew at home without splurging on fancy gear, you’ll be glad to know that most of the essentials are likely already in your kitchen. Let’s break down what you need in terms of ingredients and tools, using items commonly found in American households.
Ingredients You’ll Need
| Ingredient | Purpose | Notes |
|---|---|---|
| Coarse Ground Coffee | Main flavor base | Choose your favorite roast; medium or dark works best for a rich taste. |
| Filtered Water | Brewing liquid | Quality water is key for clean, smooth flavor. |
| Nitrogen (N2) Canister or Nitrous Oxide (N2O) Whipped Cream Charger* | Create the signature creamy texture and cascading bubbles | *Nitrous oxide is more accessible at home and works as a substitute for nitrogen. |
| Optional: Sweetener or Milk/Non-dairy Alternative | Adds flavor and creaminess if desired | Sugar, simple syrup, oat milk, or almond milk are popular options. |
Simple Tools from Your Kitchen
| Tool | Purpose | Where You’ll Find It |
|---|---|---|
| Larger Mason Jar or Pitcher (at least 32oz) | Cold brewing the coffee concentrate | Most homes have these for storage or drinks. |
| Coffee Filter or Fine Mesh Sieve (Cheesecloth optional) | Filtering out coffee grounds for a smooth brew | Coffee makers often come with filters; sieves are standard kitchen tools. |
| Whipped Cream Dispenser (with compatible charger) | Infusing gas into the cold brew for that nitro effect | Affordable versions available online or at big box stores like Target or Walmart. |
| Spoon or Stirrer | Mixing before serving | An everyday utensil found in every kitchen drawer. |
| Tall Glass or Pint Glass (Chilled if possible) | Serving your homemade nitro cold brew like a pro | Pint glasses are great for that classic café look and feel. |
Quick Tip:
If you don’t already own a whipped cream dispenser, consider it an affordable investment—most cost less than a couple of weeks’ worth of coffee shop trips and open up possibilities beyond just nitro cold brew!
3. Step-by-Step Brewing Process
Gathering Your Ingredients and Supplies
Start by selecting high-quality, freshly roasted coffee beans—preferably organic, as they contain fewer pesticide residues and offer a purer flavor profile. For the cold brew process, you’ll need coarsely ground coffee, filtered water (to avoid tap water impurities), a large mason jar or pitcher, a fine mesh strainer or cheesecloth, and a whipped cream dispenser with nitrous oxide cartridges for the nitro effect.
Measuring and Mixing for Health-Conscious Brewing
Use a coffee-to-water ratio of 1:4 (one cup of coarsely ground coffee to four cups of filtered water). This balance ensures a robust yet smooth concentrate that’s less acidic than hot-brewed coffee—making it gentler on your stomach. Place the grounds in your jar or pitcher, then pour in the filtered water slowly to saturate all the grounds evenly. Stir gently with a wooden spoon to ensure full extraction without introducing too much air, which can lead to oxidation and bitterness.
Cold Steeping for Maximum Flavor and Minimal Acidity
Cover your container and let it steep in the refrigerator for 12-18 hours. This slow extraction method allows beneficial compounds like antioxidants and natural oils to infuse into your brew while minimizing acid content, resulting in a smoother taste that’s easier on your digestive system. Avoid over-steeping beyond 24 hours, as this can draw out unwanted bitter notes.
Straining Your Cold Brew
Once steeping is complete, strain the cold brew through a fine mesh strainer lined with cheesecloth or use a reusable coffee filter. This step removes sediment and ensures a silky texture—the foundation for an authentic nitro cold brew experience. Transfer the concentrate into a clean bottle or jar, ready for the next step: infusing with nitrogen.
Optional: Adjust Strength and Serve
If you prefer a lighter drink or want to reduce caffeine content, dilute your cold brew concentrate with additional filtered water or unsweetened nut milk before serving. Store any unused cold brew in the fridge for up to one week—always in an airtight container to preserve its freshness and health benefits.
4. Infusing Nitrogen Without Fancy Gear
If you crave that creamy, cascading texture of nitro cold brew but don’t have access to professional nitrogen tanks or kegerators, don’t worry—you can achieve similar results using everyday items found in most American kitchens. The secret lies in mimicking the tiny nitrogen bubbles that create that signature velvety mouthfeel. Here’s how you can do it safely and effectively at home.
Accessible Nitrogen-Like Methods
While true nitrogen infusion requires specialized equipment, you can still get close by introducing extra air into your cold brew using common household tools. These methods won’t exactly replicate commercial nitro systems, but they’re surprisingly effective for a DIY approach.
Household Tools You Can Use
| Tool | How It Works | Result |
|---|---|---|
| Mason Jar (with tight lid) | Add cold brew, seal tightly, and shake vigorously for 30-60 seconds. | Creates micro-bubbles and mild frothiness; easy cleanup. |
| French Press | Add cold brew, plunge up and down rapidly for 30 seconds. | Forces air into coffee, giving a creamier texture and slight head. |
| Cocktail Shaker | Shake cold brew with ice for 20-30 seconds, then strain into glass. | Aerates coffee, producing foam and a silky mouthfeel. |
| Handheld Milk Frother | Froth cold brew directly in a cup for about 15-20 seconds. | Makes dense foam and smooths out the drink’s body. |
Safety First: Tips for Home Nitro-style Brewing
- Use chilled coffee: The colder your brew, the more stable the foam will be.
- Avoid overfilling: Leave room in your container for expansion during shaking or frothing to prevent spills.
- No pressurized gases needed: Don’t attempt to use CO2 cartridges or soda siphons unless specifically designed for cold brew; they may carbonate rather than create that smooth nitrogen effect.
- Serve immediately: Nitro-style bubbles dissipate quickly, so enjoy your drink right after preparation for best results.
The Science Behind the Creamy Texture
Nitro cold brew gets its unique mouthfeel because nitrogen bubbles are much smaller than those produced by carbon dioxide, resulting in a smoother, silkier sensation. By vigorously agitating your cold brew with these household tools, you introduce tiny air bubbles that somewhat mimic this effect—giving you a taste of luxury without expensive gear.
5. Serving and Storage Tips
Once you’ve successfully brewed your nitro cold brew at home, the way you serve and store it makes all the difference in achieving that authentic café vibe—right in your own kitchen. For a true nitro experience, pour your cold brew vigorously into a clear glass to showcase those beautiful cascading bubbles and creamy head. If you want to go the extra mile, chill your glasses ahead of time; this not only keeps your drink colder for longer but also enhances the visual appeal.
Skip the sugar-heavy syrups common in commercial coffee shops and opt for healthier add-ins like a splash of oat milk or unsweetened almond milk. Add a sprinkle of cinnamon or a twist of orange peel for extra flavor without extra calories.
When it comes to storage, keeping your homemade nitro cold brew fresh is key. Store it in an airtight container—preferably glass—and refrigerate immediately after brewing. This preserves both flavor and health benefits by minimizing oxidation and bacterial growth. Your nitro cold brew should stay fresh for up to one week if refrigerated properly.
For the best taste and health results, avoid letting your coffee sit out at room temperature for extended periods, as this can lead to off flavors and potential spoilage. Remember: serving your nitro cold brew at its freshest doesn’t just make it taste better—it also helps maintain the naturally low acidity and antioxidant profile that make cold brew such a popular choice among health-conscious coffee lovers.
6. Health Benefits and Considerations
A Science-Backed Comparison of Nitro Cold Brew
Nitro cold brew is more than just a trendy coffee—it offers unique health attributes when compared to other caffeinated drinks. Understanding the science behind its preparation and composition can help you make informed choices about your daily caffeine fix.
Caffeine Content: What Sets Nitro Apart?
Because cold brew coffee is steeped for an extended period, it tends to extract more caffeine from coffee grounds than traditional hot brewing methods. Nitro cold brew, which infuses cold brew with nitrogen gas, doesn’t inherently increase caffeine content but often uses a more concentrated base. A typical 12 oz nitro cold brew contains anywhere from 180–215 mg of caffeine—higher than the same size serving of standard iced coffee or soda, but less than many energy drinks. This higher caffeine level can lead to increased alertness and improved cognitive performance, but may not be suitable for individuals sensitive to stimulants.
Calorie Count and Dietary Considerations
One major advantage of nitro cold brew is its naturally creamy texture and slightly sweet flavor, achieved without adding milk or sugar. This makes it an excellent low-calorie option for those watching their caloric intake or reducing added sugars in their diet. When prepared at home without sweeteners or creamers, nitro cold brew typically contains fewer than 5 calories per serving, making it compatible with most diets—including keto, vegan, and intermittent fasting regimens.
Potential Health Benefits
The slow extraction process of cold brew preserves antioxidants such as chlorogenic acids found in coffee beans. These compounds may help reduce inflammation and support heart health. Additionally, since nitro cold brew is less acidic than hot-brewed coffee, it’s often easier on the digestive system—making it a popular choice for people who experience acid reflux or stomach sensitivity from regular coffee.
Considerations for Sensitive Groups
Despite its benefits, high caffeine content can be problematic for certain groups, including pregnant individuals, children, and those with hypertension or anxiety disorders. Moderation is key; always consult with a healthcare provider if you have concerns about caffeine intake. Also remember that homemade nitro cold brew is only as healthy as the ingredients you use—avoid excessive sweeteners and flavorings to keep your beverage as beneficial as possible.